
The Kaam Ya’tak Shrine in The Legend of Zelda: Breath of the Wild is one of those simple shrines that you never really visit once it’s done, here’s how to complete it!
Location
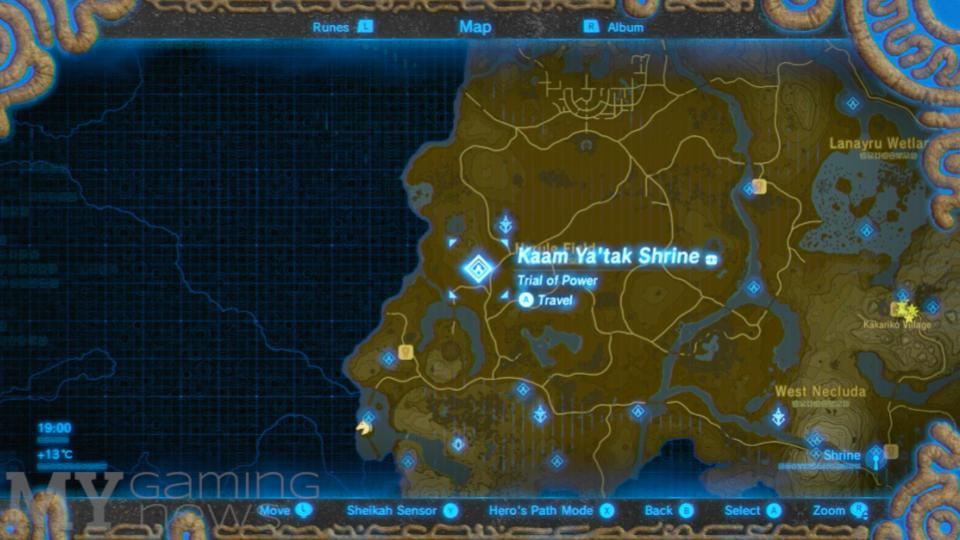
The Kaam Ya’tak shrine is located directly north of the Great Plateau and just south-west of the Central Tower. Notable locations nearby include: The Colosseum to the south-west and the Ancient Tree stump just north.
Kaam Ya’tak Shrine Walkthrough
Upon entering the Kaam Ya’tak Shrine you’ll quickly see a large stone boulder hanging by a chain and metal anchor in a tube connected to the ceiling. Magnesis the anchor and bring it to the top of the tube – let it go and the boulder will open the pathway.
In the next corridor you’ll find several spiky boulders rolling back and forth. You can use magnesis or stasis on them to clear your path and progress through the shrine.
Next, you’ll find two guardian scouts with guardian swords – take them out quickly and progress.
You’ll now see a complex of dry leaves connected to a wooden platform with a stone boulder atop. To the right of the complex is a chest; open it to find an Edge of Duality inside! Using any source of fire – a fire arrow/weapon, and arrow and a torch or the lamp hanging above – set the leaves on fire to break the wooden platform and set the ball rolling. The boulder will fly into the doors ahead of it to open it.
Walk to the next room to find some stairs and a chest – inside the chest is a Royal Broadsword. Walk ahead to find two more guardian scouts with spears this time. Walk to the other side of the room and down the stairs to find a pivoted platform on which you can use stasis to stabilise and walk across.
Continue on to find an apparatus – use the Sheikah Slate to take control of the apparatus’ hammer which you can use to hit and propell a metal orb into a stone one to break a wooden box and fall down a hole to open the next door. Before going through the doors, you can open the nearby chest to find an Ancient Core.
Walk through the next corridors to find the penultimate puzzle. This puzzle consists of dropping another stone boulder to fly over a gap and roll towards the final door. Use any source of fire to break the wooden platform upholding the stone boulder, triggering a series of boulders to fall one after the other. Next, stasis the pivoted platform to stabilise it and then stand on the pressure plate when the orb is nearing the edge of its path to propel it over the gap. Wait for it to open the door and progress.
Next, stand on the pressure plate you find in the next room and stasis the stone vehicle ahead of you. Hit it multiple times to propel it forward when stasis ends to open the next door – you’ve been in this room before.
Walk up the stairs in the next room and stand on the platform in front of the crystal. Hit the crystal to fly up rapidly and paraglide down and around the ending pillar. There is a chest to be found containing a diamond!
Use the crystal again and acquire the Spirit Orb from the Shrine’s Monk!
Full Video Walkthrough
I hope you enjoyed this article and I hope it helped! Feel free to check out our other cache of Shrine Walkthroughs to find whichever one you’re looking for!
You may also be interested in:
 Rota Ooh Shrine / Passing of the Gates – BotW
 Dah Kaso Shrine / A Minor Test of Strength – BotW
 Shee Vaneer Shrine + Shee Venath Shrine / Twin Memories – BotW
 Mezza Lo Shrine / Ancient Trifecta / The Crowned Beast – BotW
 Chaas Qeta Shrine / A Major Test of Strength – BotW
 Hateno Shrines Recommended Order (BotW)
 Kaya Wan Shrine / Shields from Water – BotW
 Sheh Rata Shrine / Speed of Light – BotW